Gặp khó khăn với những bức ảnh cũ mờ nhòe hoặc muốn phóng to ảnh mà không bị vỡ nét? Đừng lo, Upscayl sẽ giúp bạn giải quyết tất cả! Đây là một công cụ mã nguồn mở hoàn toàn miễn phí, sử dụng sức mạnh của trí tuệ nhân tạo (AI) để nâng cấp chất lượng hình ảnh theo cách khiến bạn phải ngạc nhiên. Hãy cùng Tentenai.vn khám phá Upscayl có gì đặc biệt và cách bạn có thể dùng nó để “biến hình” cho những bức ảnh của mình!
Upscayl là gì?
Upscayl là phần mềm mã nguồn mở được phát triển bởi cộng đồng, giúp bạn nâng cấp hình ảnh mà không tốn một xu. Kết hợp giữa AI và Vulkan – một API đồ họa mạnh mẽ – Upscayl tận dụng GPU của bạn để xử lý ảnh với tốc độ cực nhanh. Dù bạn đang dùng Linux, macOS hay Windows, Upscayl đều hỗ trợ đầy đủ. Hãy tưởng tượng việc “hồi sinh” những bức ảnh cũ mờ nhòe hoặc phóng to ảnh mà vẫn giữ được độ sắc nét như chụp bằng máy ảnh chuyên nghiệp – đó chính là điều kỳ diệu mà Upscayl mang lại!
Upscayl có thể làm được gì?
Upscayl không chỉ đơn thuần là công cụ phóng to hình ảnh — nó là một “cỗ máy nâng cấp” mạnh mẽ dành cho ảnh của bạn. Dưới đây là những gì Upscayl mang lại:
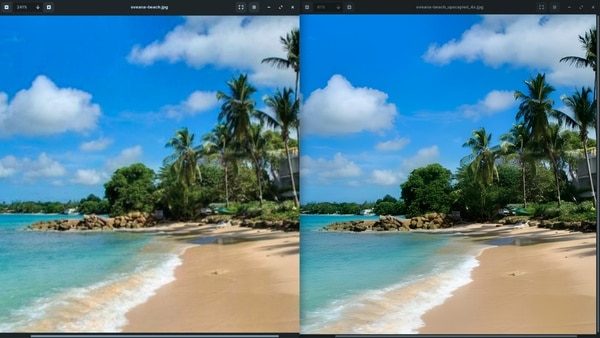
Phóng to ảnh mà không giảm chất lượng: Sử dụng các mô hình AI như Real-ESRGAN, Upscayl dự đoán và tái tạo lại chi tiết trong ảnh, cho phép bạn phóng to lên đến 4 lần mà hình ảnh vẫn sắc nét như ban đầu.
Batch processing: Got a bunch of images to upgrade? Upscayl’s batch upscaling feature lets you process an entire folder with just a few clicks.
Sharpen and enhance: Beyond enlarging, Upscayl boosts sharpness and improves colors, making your photos look vibrant and alive.
Xử lý hàng loạt: Có nhiều ảnh cần nâng cấp? Tính năng phóng to hàng loạt của Upscayl cho phép bạn xử lý toàn bộ thư mục chỉ với vài cú click chuột.
Làm sắc nét và cải thiện hình ảnh: Không chỉ phóng to, Upscayl còn tăng độ sắc nét và cải thiện màu sắc, giúp ảnh của bạn trở nên sống động và rực rỡ hơn bao giờ hết.
Upscayl hoàn toàn phù hợp với bất kỳ ai muốn nâng cấp hình ảnh mà không cần đến kỹ năng chỉnh sửa phức tạp. Đây là lựa chọn lý tưởng cho:
Nhiếp ảnh gia không chuyên: Muốn in ảnh khổ lớn hoặc chia sẻ ảnh chất lượng cao mà không bị mờ nhòe? Upscayl là lựa chọn hoàn hảo cho bạn.
Người lưu giữ kỷ niệm: Có những bức ảnh cũ từ máy ảnh đời đầu hoặc điện thoại lỗi thời? Upscayl có thể biến chúng trở nên như mới.
Nhà thiết kế đồ họa: Cần ảnh độ phân giải cao cho dự án nhưng chỉ có bản chất lượng thấp? Upscayl chính là “cứu tinh” của bạn.
Cách cài đặt và sử dụng Upsayl như nào?
Yêu cầu hệ thống
Hệ điều hành:
Linux: Ubuntu 20.04 trở lên
Windows: Windows 10 trở lên
macOS: macOS 12 trở lên (hỗ trợ macOS 11 sẽ quay lại trong phiên bản sắp tới)
GPU: Phải hỗ trợ Vulkan 1.3.
GPU tích hợp tương thích: Intel HD Graphics 620, 630, Iris Graphics và hầu hết GPU AMD Vega
GPU rời: Thường hoạt động tốt, ngoại trừ dòng GTX 7xx hoặc GT 920M.
Cách cài đặt Upscayl
Linux
Upscayl có sẵn trên hầu hết các kho phần mềm của các bản phân phối Linux, hỗ trợ cả Flatpak và Snap qua cửa hàng ứng dụng của bạn. Nếu bạn muốn dùng phiên bản di động (portable), làm theo các bước sau:
Truy cập mục Releases trên GitHub hoặc trang chính thức upscayl.org.
Tải về tệp upscayl-x.x.x-linux.AppImage.
Nhấp chuột phải vào tệp, vào mục Permissions (Quyền) và tick vào “Allow executing file as program” (Cho phép chạy tệp dưới dạng chương trình).
Nhấp đúp để chạy – không cần cài đặt!
Ngoài ra, bạn cũng có thể cài đặt bản RPM (cho Fedora), DEB (cho Ubuntu/Debian) hoặc bản ZIP (cho mọi bản Linux x86) nếu muốn cài đặt vĩnh viễn.
macOS
Truy cập mục Releases trên GitHub hoặc trang web chính thức.
Tải về tệp upscayl-x.x.x-mac.dmg.
Nhấp đúp vào tệp DMG, rồi kéo biểu tượng Upscayl vào thư mục Applications.
Mở Finder, vào Applications, nhấp chuột phải vào Upscayl, chọn Open, sau đó chọn Open lần nữa trong cửa sổ bật lên.
Windows
Truy cập mục Releases trên GitHub hoặc trang web chính thức.
Tải về tệp upscayl-x.x.x-win.exe.
Nhấp đúp vào tệp EXE để bắt đầu cài đặt.
Nếu xuất hiện cảnh báo SmartScreen, chọn More Info > Run Anyway hoặc bấm YES trong hộp thoại nhà phát hành không xác minh.
Làm theo hướng dẫn cài đặt và bạn đã sẵn sàng sử dụng!
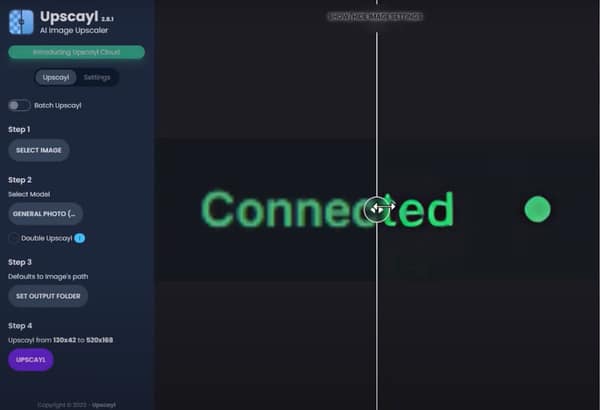
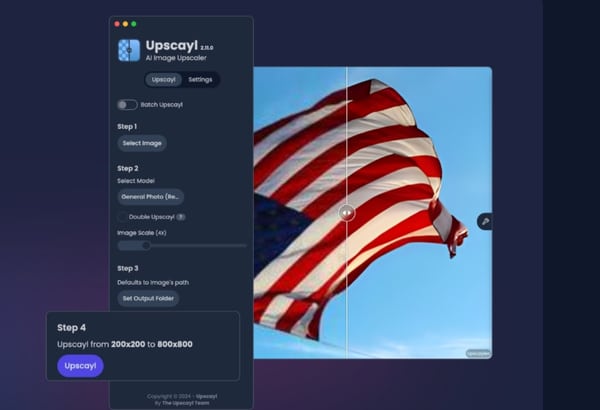
Cách sử dụng Upscayl
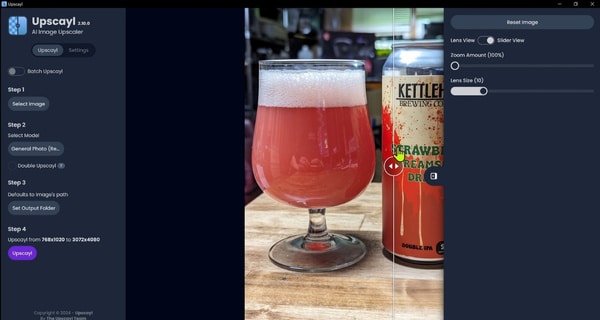
Giao diện của Upscayl cực kỳ thân thiện với người dùng, với hướng dẫn rõ ràng được tích hợp sẵn. Bạn chỉ cần làm theo các bước sau:
Chọn hình ảnh của bạn: Muốn chỉnh sửa nhiều ảnh cùng lúc? Bật Batch Upscayl và nhấp vào Chọn thư mục (Select Folder).
Chọn mô hình AI: Trong phần Chọn mô hình (Select Model), hãy chọn mô hình phù hợp với nhu cầu của bạn (Real-ESRGAN là mặc định).
Chọn thư mục lưu ảnh: Chỉ định nơi bạn muốn lưu các hình ảnh đã được nâng cấp.
Nhấn Upscayl: Nhấp vào nút Upscayl, chờ vài giây và tận hưởng kết quả tuyệt vời!
Muốn thay đổi định dạng tệp đầu ra, giao diện, mức độ phóng to hoặc cài đặt GPU? Hãy vào phần Cài đặt (Settings) để điều chỉnh mọi thứ theo ý bạn.
Trên đây là chi tiết hướng dẫn cách sử dụng Upscayl – Công cụ AI nâng cấp chất lượng ảnh miễn phí cùng với cách cài đây. Đây là một trong những mã nguồn mở về hình ảnh mạnh mẽ nhất hiện nay. Chúc các bạn ứng dụng thành công!